Primrose Lane
Connect with Us!
  • Home
  • Store
  • Free Download
  • Win a Pattern!
  • Contact Us
  • 2020 Schedule
  • Beth's Blog
  • Info for Quilt Guilds and Shops
    • Custom Fabric Design
    • Redwork Presentation
  • Gallery

Simply Seasons - Autumn

9/20/2019

1 Comment

 
Picture
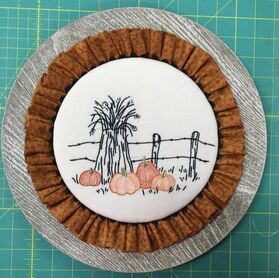
Yesterday I was inspired by a decorative charger plate that I saw at a store.  Since then it has been transformed into a beautiful finished project!  Yes, I finished it in less than 24 hours!  I know, I am really surprised too!   You may not get yours completed quite so quickly, but here are the step by step instructions that I promised. 

1. Transfer the design to your fabric either by tracing or using a transfer medium such as Stick n Stitch. (Available on my website.)

2.  Embroider using one strand of Valdani 12 weight perle cotton. (If you prefer you may substitute 2 strands of embroidery floss.)  I used 4 different colors: Black, H202, O217, and O510. (these are also available on my website.)

3. Trim away any excess transfer medium around the design, and wash the remaining transfer medium away in a sink full of tap water. 

4. After removing the transfer medium, spread the wet fabric out on your kitchen counter or other smooth surface. The water will make the fabric "stick" to the countertop and actually block the fabric as it dries. I usually do this in the evening so it can dry overnight while no one is in the kitchen making a mess. 

5. When you get up in the morning the fabric has dried and is
 ready to be pressed and trimmed to the final size, or embellished further by adding beads, charms or coloring with crayons.

​6. I chose to color the pumpkins in this design using regular Crayola crayons.  Color them as desired, then heat set using a hot iron.  Be sure to use a pressing cloth or paper towels between the iron and the colored fabric so you don't damage your iron or ironing surface.

7. Trim batting to fit the cardboard circle that you will mount your design on.  I used 2 layers of batting.

8. Glue batting to cardboard.

​9. Trim fabric to a circle that is at least 4" wider than the cardboard circle. (2 inches on each side.)

10. Fold fabric to the wrong side approximately 1/4" and gather using strong thread.  I used some of the black perle cotton.

11.  Wrap completed fabric circle around cardboard circle so the batting is under the embroidery and the gathers are evenly spaced.  Tie off the gathering thread. 

​12.  Choose your desired fabric for the ruffle. Cut strips and sew together end to end on a diagonal. Trim excess at seams and press seams open. 

13. Fold ruffle lengthwise wrong sides together, and press.  Gather along raw edge.

14. If you are choosing to add the rick rack as well as the ruffle, attach rick rack to embroidery so that it extends about halfway around the outside edge.  Stitch in place.
My images show the rick rack being added after the ruffle - that's what happens when a design evolves...

15. Pin ruffle to the back of the circle, so it extends evenly on all sides and the gathers are evenly distributed.  Stitch in place.

​16. Glue completed embroidery to the center of the charger.  Place several heavy books on top to apply pressure until the glue dries.  (I used Tacky Glue.)

17.  Your finished embroidery is now ready to be displayed on a plate stand or hung on the wall using an adhesive picture hanger. 

​    
1 Comment

When real life gets in the way...

4/21/2018

0 Comments

 
I don't know about you, but I have great plans! Every year (sometimes every day) I set goals that I probably will never reach:  I am going to lose lots of weight... I am going to exercise every day... I am going to finally finish the UFO's in my collection... I am going to update my website every week... I am going to write my blog faithfully... I am going to design a new pattern every week.  Great goals, but not really attainable, at least not in my world. 

But some goals are more important than others... I am going to be a better wife... better mother... better Christian... better ME!
Those are the goals that I am honestly trying to focus on.  So I ask your forgiveness when I fall so dreadfully short in the other, less critical areas.  Even in these important areas my progress is painfully slow and sometimes nonexistent.

Currently we are remodeling our home and part of that remodel will include an enormous sewing room, as well as a new kitchen and family room. I get a little overwhelmed when I look at the current chaos - my sink, stove and fridge are in my dining area, and my table, chairs and food are stacked in my living room. I can't use my washer, dryer or sewing machines right now. They are blocked in by boxes of kitchen items.  Its a bit frustrating and I have several more weeks before the addition is ready. I just have to remind myself that a brighter day is coming!  

I don't know many of you personally. Some I have met at the various quilt shows.  Others I have gotten to know a little better. I have been blessed to be able to pray with some of you as you shared the trials of your own personal life, and I am honored that you consider my designs worthy of your time and effort.  

Whatever you are going through today, I hope you remember that a brighter day is coming!  Trials are not forever.  In the scheme of things, the small failures and problems that upset us are inconsequential.  Focus on the bigger picture.  Reward yourself for small victories, and keep going forward. You can do it!

​Blessings, Beth 


0 Comments

Calling all Cat Lovers!

12/29/2015

1 Comment

 
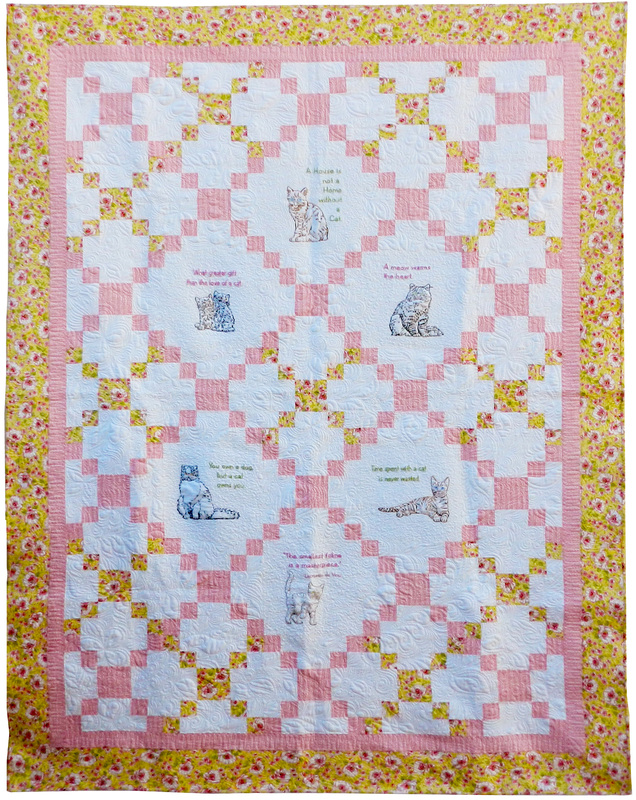
Many of you may have seen me working on "The Cat Quilt" this past summer at various shows... well, the quilt pattern is finally finished!  The photography does not do it justice.  It turned out beautiful!   The fabric is a warm butter yellow with pink flowers.  I embroidered the lettering in pink and green to match the fabric.  

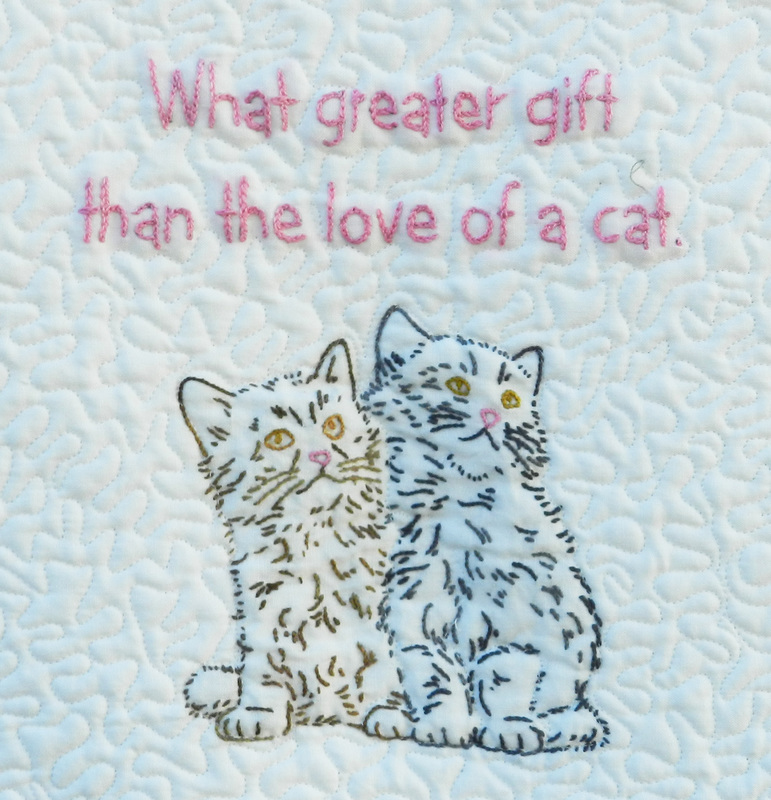
Inspired by my granddaughter Lily and her new kitten, this charming quilt features six different embroidered blocks.  I just added it to the website, so you can find it here. 

​If you want to get started right away, one of the blocks is now available on our Free Download Page. 

Picture
Picture
1 Comment

Time Flies!

12/27/2015

4 Comments

 
I apologize for being such a terrible blogger!  I can't believe it has been over a year since I posted.  Please forgive me. I have determined to do better in 2016. 

I am currently working on a new pattern, and hope to have it completed by the middle of the week. It has been a fun project!  Hopefully you will have as much fun making it as I am having designing and stitching it.

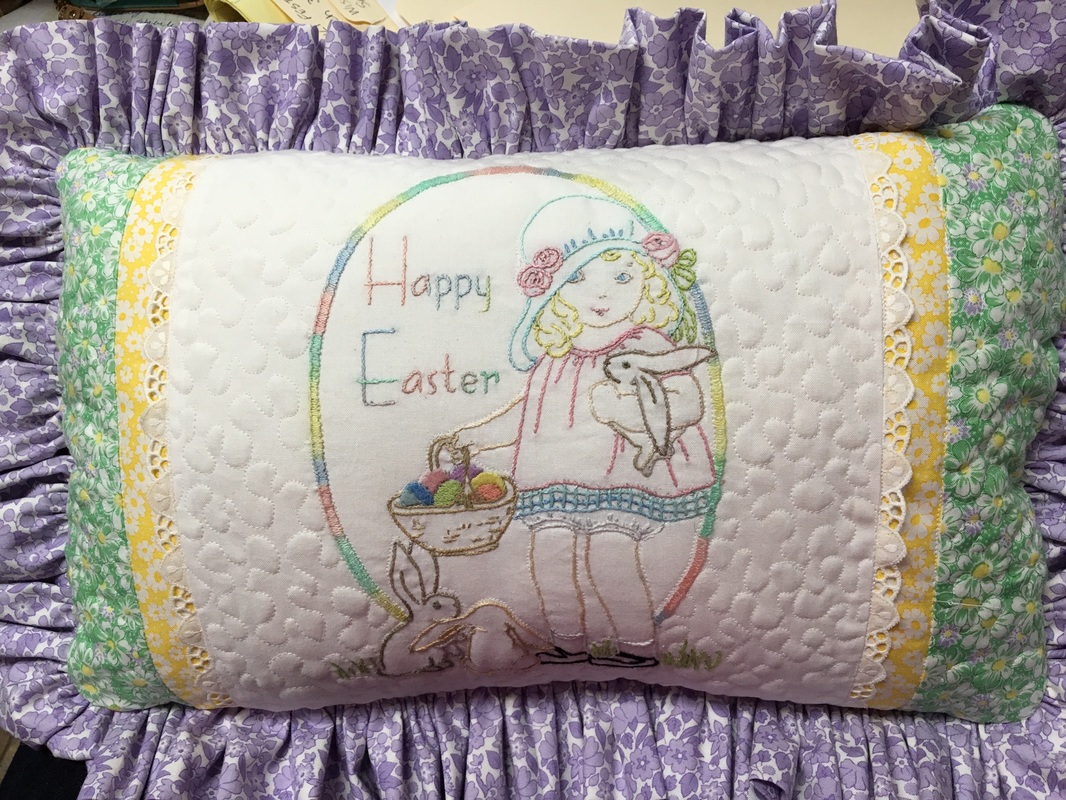
Isn't she adorable? The pattern will be called "Happy Easter".   The design is based on an Easter greeting card from the 1930's.  Although I have made dozens of pillows over the years, this is the first time I have included instructions for one in a pattern.  

The pillow is hand embroidered with a French fold back, and lace trim on the front.  I am also including a step that helps eliminate the overly pointy corners that so often happens when making a pillow.  I think you will like it. 

Until next time.... Blessings, Beth


​
Picture
4 Comments

Home of the Free is finished!

7/19/2014

6 Comments

 
Picture
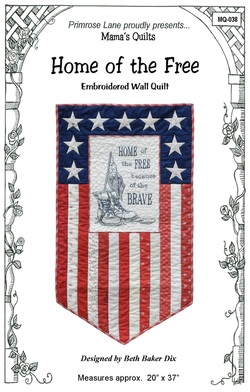
I am thrilled to announce that the "Home of the Free" pattern has been completed and is up on the website!  I am so happy with how it turned out.

The pattern includes instructions for making it scrappy as shown, or with only 3 colors.  It also includes a suggestion for making it into a Remembrance Quilt by embroidering the name, rank, service dates and conflict name onto the 13 stripes for each serviceman/woman..  

I putter some with genealogy, so I plan to go back and find information on ancestors who fought in various wars in our nation's history, and embroider their names, rank , date of birth and death, and conflict they fought in.  I think it will make it a very special quilt that I can pass down to my children and eventually grandchildren. 

...now to get busy on completing another project!

6 Comments

How small should I make my stitches?

7/13/2014

6 Comments

 
I have finally decided that Primrose Lane needs a blog! 

Bert "de-husband" and I, the "designer", are privileged to meet many of you at quilt shows across the country. While we are in the booth, I usually have my embroidery hoop in my hands, demonstrating my embroidery techniques and answering questions. However, since there are many more of you whom I have not met, I will try to do the same for you here on my blog. 

With that said, here we go...

Many of those visiting my booth think my designs are machine stitched because the stitches are so small and even. Others comment that "My stitches don't look like yours!" My response is always "You need to make smaller stitches."

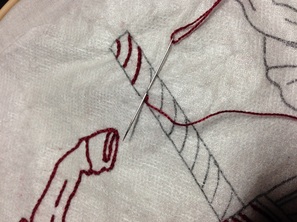
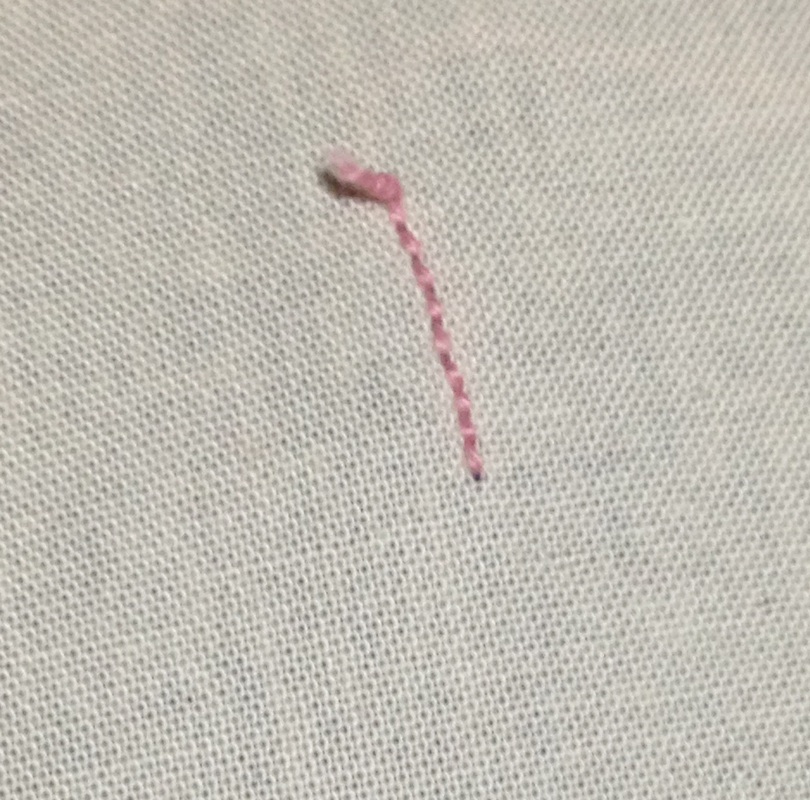
Here is an example of how small I usually make my stitches...(Illustration 1) 


Yes, they are TINY... I usually take about 1/12 to 1/16 of an inch "bite" of the fabric at my smallest. I do get a little larger when stitching on long straight lines. Like you, I do get in a hurry and want to get my project finished sooner. 


As you can see from the photo, I prefer the stem stitch for most of my stitches, switching to a backstitch when the curves are especially small. Why? I will go into those details on my next post...


I also prefer pearl cotton over traditional embroidery floss. That will also be addressed in a future post. 

I ALWAYS use an embroidery hoop, and will explain why in a future post.

Here's how I do a stem stitch... 
To make the stitches easier to see in the following photos, I have omitted the drawn line that I would normally be following. Thread one strand of 12 weight pearl cotton in a size 7 or 8 embroidery needle. Knot one end. Bring your needle through the fabric where you want to begin stitching so that the knot is on the back of the fabric. 

I am right handed.  When stitching a stem stitch, I start on the left, heading towards the right.  The eye of my needle "needs to see where it is going", so the point of the needle is pointed towards the left. 

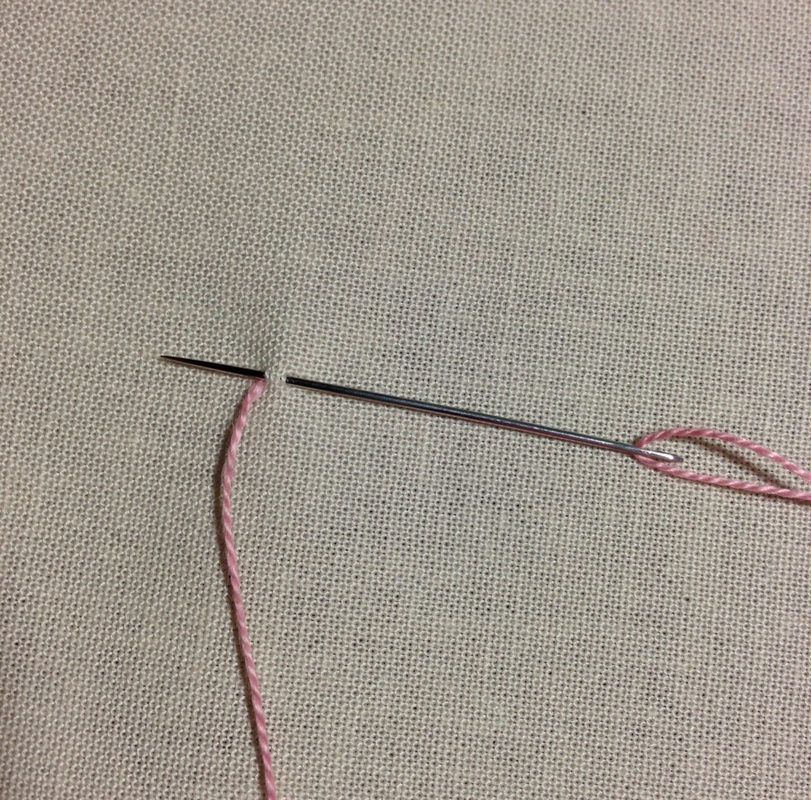
Insert the needle approximately 1/12 of an inch to the right, bringing needle back through the fabric at or very close to where you made your initial stitch. 

(Illustration 2)

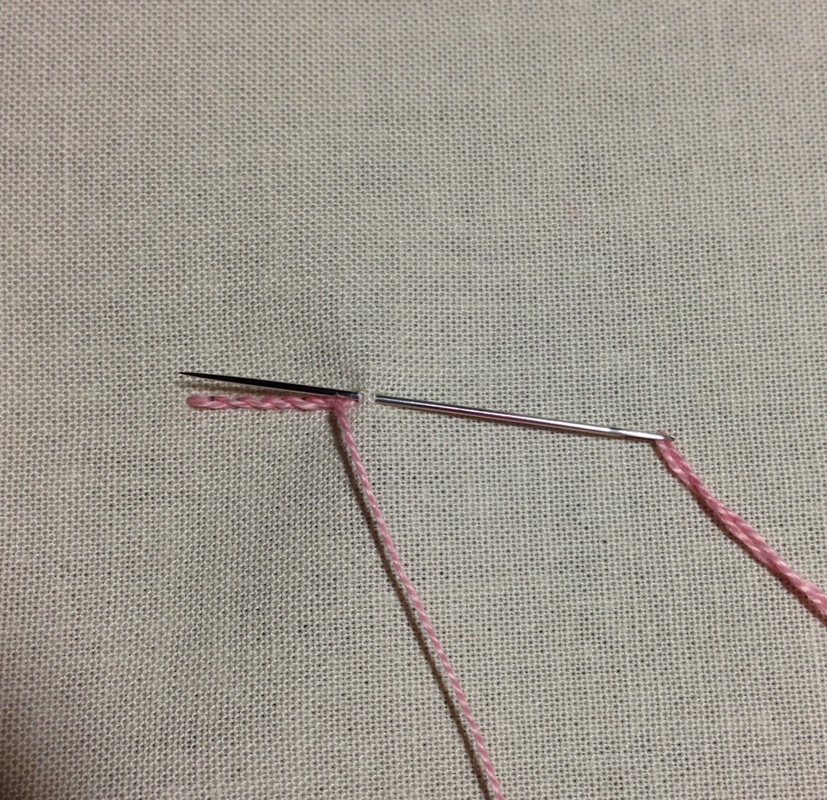
Continue stitching in the same way, creating a smooth line of even stitches. (Illustration 3) Keep the needle along the line. There is no need to slant your needle. Keeping the needle on the line allows the threads to create a rope like texture.

As you can see by looking at Illustration 4, the underside of the fabric shows a very neat line of stitches.  In this example the stitches butt up against each other. That is not always the case.  If you have a few threads of fabric between your stitches on the back, do not panic. The stitch police will not come get you!

When I have finished stitching, or run out of thread, I either tie a knot, or weave the thread through previous stitches on the underside of the fabric for about an inch, and then trim the excess thread.


I hope this has answered your questions regarding stitching a stem stitch  If you have any other questions, let me know, and I will try to help.  


I hope you are looking forward to my  next post as much as I am. 

Blessings, Beth.


Picture
Illustration 1
Picture
Illustration 2: Taking the first stitch.
Picture
Illustration 3: Continue stitching towards the right.
Picture
Illustration 4: The underside of the stitching.
6 Comments

    Author

    Beth Dix is the Owner and Designer of Primrose Lane.

    Archives

    September 2019
    April 2018
    December 2015
    July 2014

    Categories

    All
    Embroidery
    Needlework Tutorial
    Quilting
    Redwork

    RSS Feed

      Contact me...

    Submit