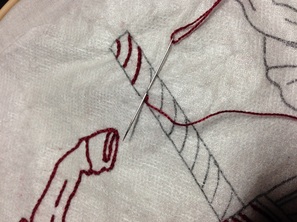
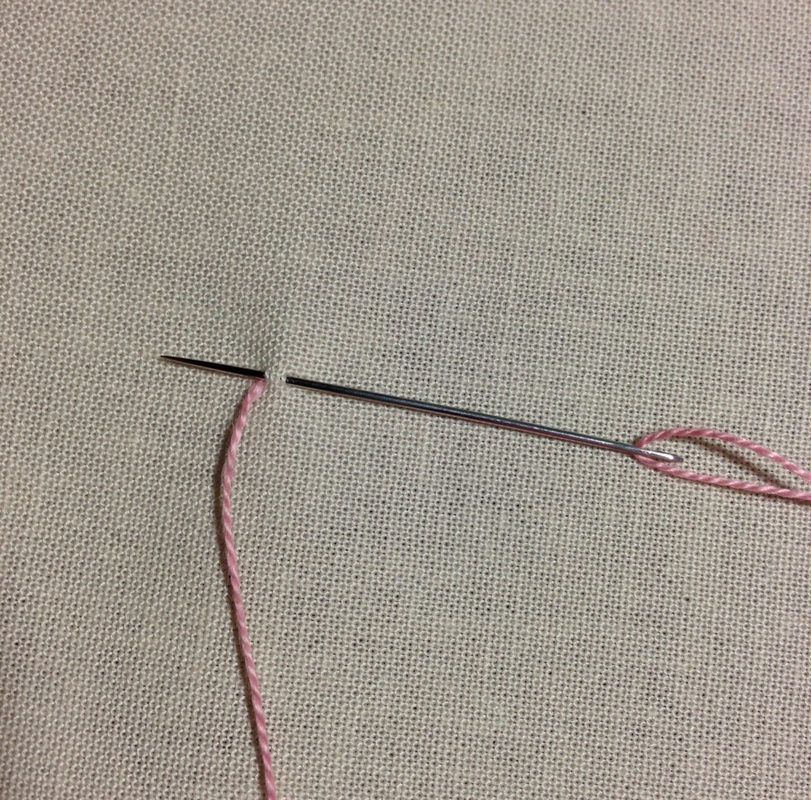
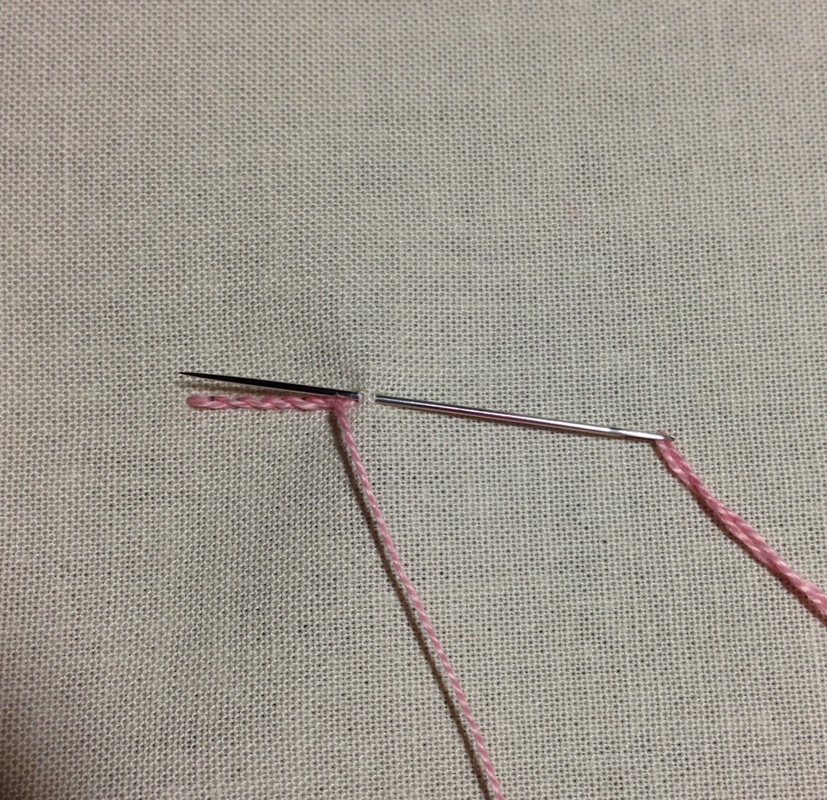
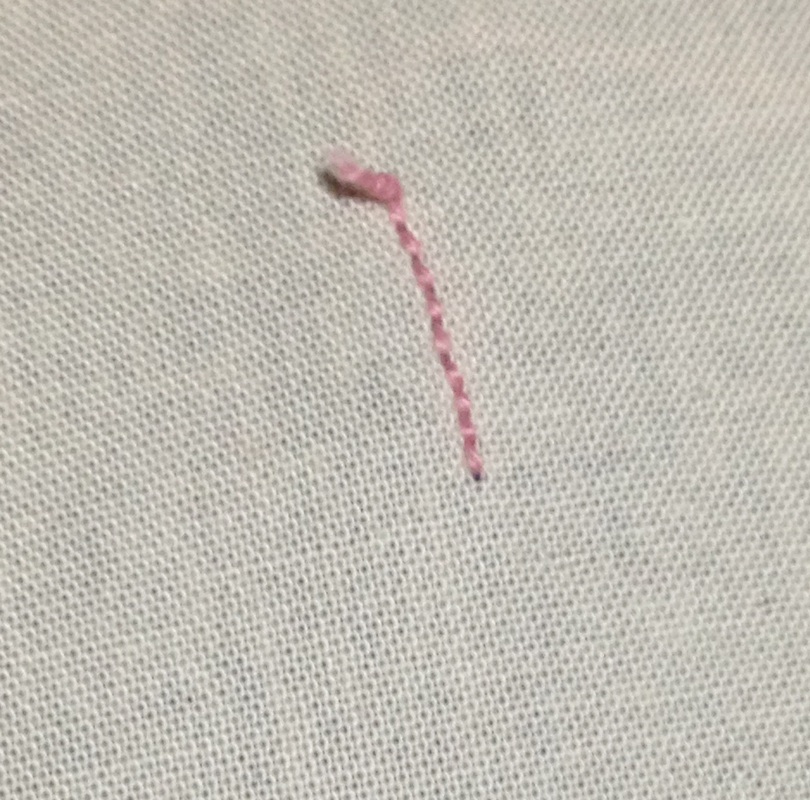
| I have finally decided that Primrose Lane needs a blog! Bert "de-husband" and I, the "designer", are privileged to meet many of you at quilt shows across the country. While we are in the booth, I usually have my embroidery hoop in my hands, demonstrating my embroidery techniques and answering questions. However, since there are many more of you whom I have not met, I will try to do the same for you here on my blog. With that said, here we go... Many of those visiting my booth think my designs are machine stitched because the stitches are so small and even. Others comment that "My stitches don't look like yours!" My response is always "You need to make smaller stitches." Here is an example of how small I usually make my stitches...(Illustration 1) Yes, they are TINY... I usually take about 1/12 to 1/16 of an inch "bite" of the fabric at my smallest. I do get a little larger when stitching on long straight lines. Like you, I do get in a hurry and want to get my project finished sooner. As you can see from the photo, I prefer the stem stitch for most of my stitches, switching to a backstitch when the curves are especially small. Why? I will go into those details on my next post... I also prefer pearl cotton over traditional embroidery floss. That will also be addressed in a future post. I ALWAYS use an embroidery hoop, and will explain why in a future post. Here's how I do a stem stitch... To make the stitches easier to see in the following photos, I have omitted the drawn line that I would normally be following. Thread one strand of 12 weight pearl cotton in a size 7 or 8 embroidery needle. Knot one end. Bring your needle through the fabric where you want to begin stitching so that the knot is on the back of the fabric. I am right handed. When stitching a stem stitch, I start on the left, heading towards the right. The eye of my needle "needs to see where it is going", so the point of the needle is pointed towards the left. Insert the needle approximately 1/12 of an inch to the right, bringing needle back through the fabric at or very close to where you made your initial stitch. (Illustration 2) Continue stitching in the same way, creating a smooth line of even stitches. (Illustration 3) Keep the needle along the line. There is no need to slant your needle. Keeping the needle on the line allows the threads to create a rope like texture. As you can see by looking at Illustration 4, the underside of the fabric shows a very neat line of stitches. In this example the stitches butt up against each other. That is not always the case. If you have a few threads of fabric between your stitches on the back, do not panic. The stitch police will not come get you! When I have finished stitching, or run out of thread, I either tie a knot, or weave the thread through previous stitches on the underside of the fabric for about an inch, and then trim the excess thread. I hope this has answered your questions regarding stitching a stem stitch If you have any other questions, let me know, and I will try to help. I hope you are looking forward to my next post as much as I am. Blessings, Beth. |
|
17 Comments
Sue
7/14/2014 10:05:46 am
Glad that you have a blog. I will be reading about your stitches.
Reply
Julia
7/23/2014 09:05:48 am
Thanks for sharing. I'm exacted to see you have a blog. I ordered some of your patterns a while back and have never gotten the nerve to start them. Maybe this will give the confidence to get started.
Reply
rosemarie
9/20/2015 08:34:04 am
I saw you do a demo at the oaks,pa show. and really liked your patterns. then I stopped at you booth and WOW! really was impressed. you stopped to show me the stem stitch and backstitches. also I had a problem with the lazy daisy and figured out because I was pulling the floss too tight. thank you for all you help looking forward to a great embroidery journey w/you. hope you put out some youtube videos.
Reply
Sharon Buban
8/4/2016 03:52:59 pm
Will you be having a booth at the Houston International Quilt Festival?
Reply
Donna Hysore
10/13/2018 09:48:39 am
Also saw your beautiful work at the Oaks show. Waiting to hear the blog on the pearl cotton
Reply
6/9/2023 01:12:33 am
Ever since My fashion is to sew clothes that fit me, Right now I learn how to sew more.
Reply
11/24/2023 02:04:41 am
Hey there, Thanks for updating information about the subject.. Very useful for me.
Reply
2/13/2024 12:16:50 pm
Your comment adds a lot to the conversation. Thanks for contributing.
Reply
2/29/2024 09:10:59 am
I'm grateful for the practical tips you've shared. Can't wait to implement them!
Reply
3/2/2024 02:13:12 pm
Wonderful! You always deliver quality content! Looking for an interior painter? Brigham Painting & Drywall has the skills you need!
Reply
3/3/2024 02:07:44 pm
Such a charming piece! Delighted to stumble upon this article. We invite you to explore our website for top-notch sprinkler repair services!
Reply
3/4/2024 05:06:43 am
Superb! Your insights are truly valuable! Looking for a reliable water heater contractor? Look no further!
Reply
3/4/2024 11:56:53 am
Lovely piece! Happy to have discovered this blog. Explore our website for plumbing contractor Ogden.
Reply
6/21/2024 02:17:48 am
Thanks for sharing this content!
Reply
Leave a Reply. |
AuthorBeth Dix is the Owner and Designer of Primrose Lane. Archives
October 2023
Categories
All
|


 RSS Feed